IFTTT Integration
IFTTT (If This Then That) defines a clear and concise protocol which your service’s API will implement. Each trigger and action for your service will map 1-to-1 to an API endpoint on your service built specifically for IFTTT. Trigger endpoints will be event streams that IFTTT will poll for new data. Conversely, action endpoints will be writable endpoints that IFTTT will send data to. For services that use OAuth, IFTTT is fully compatible with a couple of the common flavors of OAuth 2.0.
IFTTT is a free platform that helps you do more with all your apps and devices. We will use IFTTT to send notifications to our users when some trigger occurs. We will have to integrate our IFTTT Api with the IFTTT system. IFTTT will have access to our API’s to poll the data they require.
IFTTT API
Creating Web App
- Go to the Azure Portal and using the Dashboard you can find and create a Web App resource.
- On creation page you can connect the Web App to the already existing Application Insights that you created earlier.
Setup OAuth 2.0 Authentication
To setup Azure OAuth 2.0 Authentication you will need to create 2 AAD (Azure Active Directory) Applications. One will represent the IFTTT API, and the other will be have privileges to access the IFTTT API and will be used to obtain access tokens with which you will authenticate yourself in front of the IFTTT API.
IFTTT API AAD Application
- Open the Azure Portal and go to Azure Active Directory.
- Open App registrations and click on “New registration”.
- On creation for “Redirect URI” put the URL of your IFTTT Web App + “/.auth/login/aad/callback”. Example: “https://osohw-test-iftttapi.azurewebsites.net/.auth/login/aad/callback”.
- After it’s created go to “Manifest” and add “identifierUris” which is the URL of your IFTTT Web App.
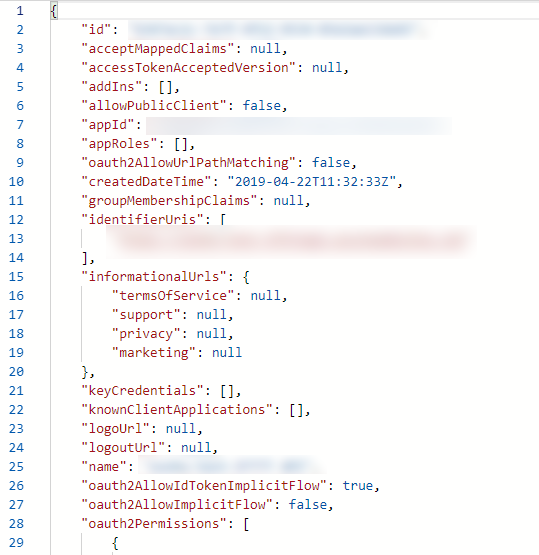
Figure 1. IFTTT Identifier URL
IFTTT App AAD Application
- Open the Azure Portal and go to Azure Active Directory.
- Open App registrations and click on “New registration”.
- On creation for “Redirect URI” put the URL of your IFTTT Web App.
- After it’s created go to “Certificates & secrets” and create a new “Client Secret”, save it somewhere it will be required for you to get an access token.
- Go to “API permissions” and add a permission to access the IFTTT Api AAD Application.

Figure 2. IFTTT API Permissions
Setup application settings
Now it’s time to setup the appsettings.json of the IFTTT Api.
- Open Visual Studio 2017 and open the “IoTWaterHeater” solution.
- Find the “IFTTTAPI” assembly and there under appsettings.json you will see appsettings.Development.json.

Figure 3. IFTTT API Settings
- Open the appsettings.Development.json and edit the following variables:
- TenantId – To get your Tenant Id go to the Azure Portal, Azure Active Directory, Properties and copy the “Directory ID”. The tenant id should look like this:
https://login.microsoftonline.com/{your tenant id here}
- Domain – The domain should be the URL of the newly created IFTTT Web App.
- ClientId – The client id should be the URL of the newly created IFTTT Web App.
- InstrumentationKey – The instrumentation key of the Application Insights you created earlier.
- IFTTTServiceKey – The key of your IFTTT Service (you will come back to fill this after you complete the next chapter of this document “IFTTT Service”).
- IFTTTAppId – The application ID of the IFTTT App AAD Application.
- TenantAuthority – The tenant ID of the IFTTT App AAD Application. To get your Tenant Id go to the Azure Portal, Azure Active Directory, Properties and copy the “Directory ID”. The tenant id should look like this:
https://login.microsoftonline.com/{your tenant id here}
- ClientId - The application ID of the IFTTT App AAD Application.
- ClientSecret – The client secret you created for IFTTT App AAD Application.
- ResourceId – The IFTTT Web App URL.
- IoTHub.ConnectionString - The connection string to your IoT Hub.
For the Azure Web Application to be able to read the correct appsettings.json you now need to go the resource Application Settings and a new one. Since we are using the appsettings.Development.json you will need to add an environment variable with value “Development”.
Figure 4. IFTTT API Environment Variable
IFTTT Test User
IFTTT will need you to provide a test user through which they can test your service on publish. You can go the Azure Active Directory and under “Manage” section click on “Users”. From there you can add a new user by clicking on the “New user” button. After that go to Azure Active Directory and under “Manage” section open “Enterprise applications”. In the list of applications find your IFTTT App AAD Application and open it. Then under “Manage” you will see “Users and groups” open it. Click on “Add user” and select the test user you created.Save your user information somewhere because you will need it later.
IFTTT Service
IFTTT is a free platform that helps you do more with all your apps and devices. We will use IFTTT to send notifications to our users when some trigger occurs. We will have to integrate our IFTTT Api with the IFTTT system. IFTTT will have access to our API’s to poll the data they require.
Api Section
General tab
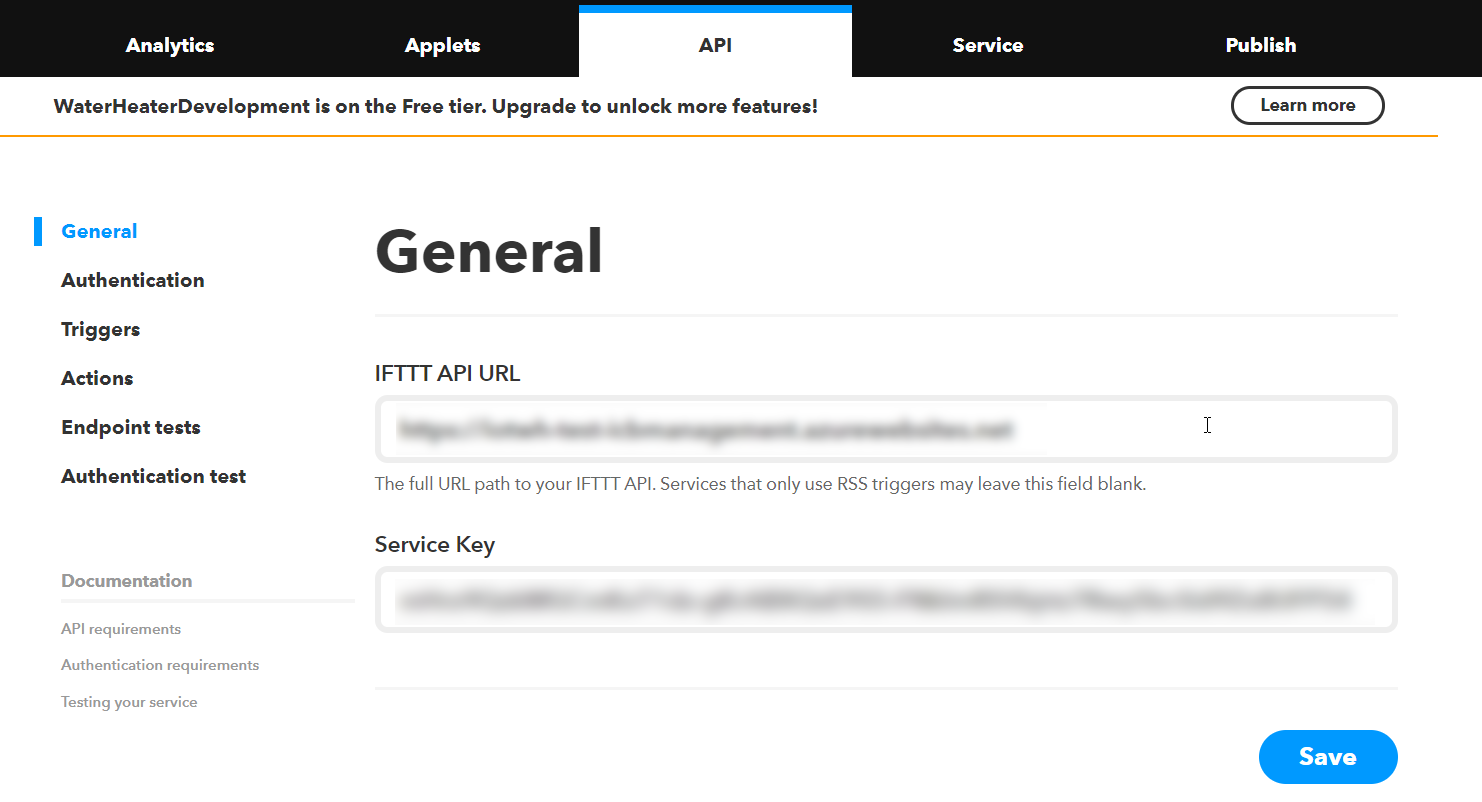
Figure 5. IFTTT API General tab
In the general tab there are 2 fields. In “IFTTT API URL” you need to input the URL of the Management Web App. The second field “Service Key” is something you will need later so make sure to save it somewhere. Now let’s move on to the “Authentication” tab.
Authentication tab

Figure 6. IFTTT API Authentication tab
In the authentication tab select the option “My API has users with expiring OAuth2 access tokens and uses refresh tokens”. After you do that some new fields will show up where you will need to input the correct data so IFTTT can authenticate itself in front of our API’s.

Figure 7. IFTTT Authentication fields
-
Client ID – here you need to input the Application ID of your IFTTT AAD Application.
-
Client secret- here you need to input the Password key you created when creating IFTTT AAD Application.
For the “Authorization URL” and “Token URL” you need to go to your Azure Portal and open Azure Active Directory.
Under “Manage” section open “App registrations (Preview)” and from there you should open “Endpoints” which can be found on top of the blade. You are looking for “OAUTH 2.0 Token Endpoint (v2)” and “OAUTH 2.0 Authorization Endpoint (v2)”.

Figure 8. AAD Authorization endpoints
Before you paste them into the fields you need to make small editions to the Authorization URL. At the end of your Authorization URL you need to add the following:
?scope={URL of your Management Web App}/user\_impersonation offline\_access
Example Authorization URL: https://login.microsoftonline.com/d4f23865-c0bd-4784-8c5c-165750372dc3/oauth2/v2.0/authorize?scope=https://iotwh-test-iftttapi.azurewebsites.net/user_impersonation offline_access
-
Authorization URL – now that you edited your Authorization URL put it in.
-
Token URL – put in the Token endpoint URL you just copied from the Azure Portal.
Redirect URL after authentication completes:
https://ifttt.com/channels/{{service\_id}}/authorize.
This is what your redirect URL should look like, and instead of {service_id} put in the actual IFTTT service ID you chose earlier.
In the Demo account fields you need to input the account information of the IFTTT test user you created earlier in the Azure Portal. Put in the Account Login and Password. The “Demo account notes” can be anything. You are ready with Authentication tab, make sure to save.
Triggers tab
You will create a trigger for Control Mode Change. When you open the triggers tab you should see a “New trigger” button, click it.

Figure 9. IFTTT Triggers
Make your trigger name section look the same as the image and click save. After you save more fields will show up. Firstly you will create a new Trigger Field.
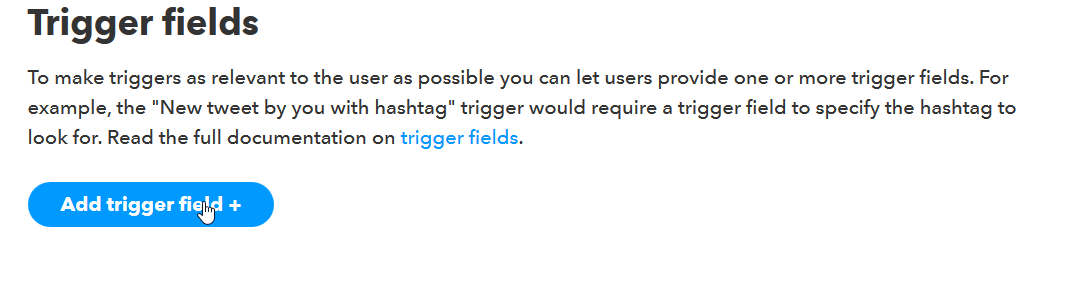
Figure 10. IFTTT Trigger Fields
After creating a trigger field you will have to setup it.

Figure 11. IFTTT Trigger DeviceId field
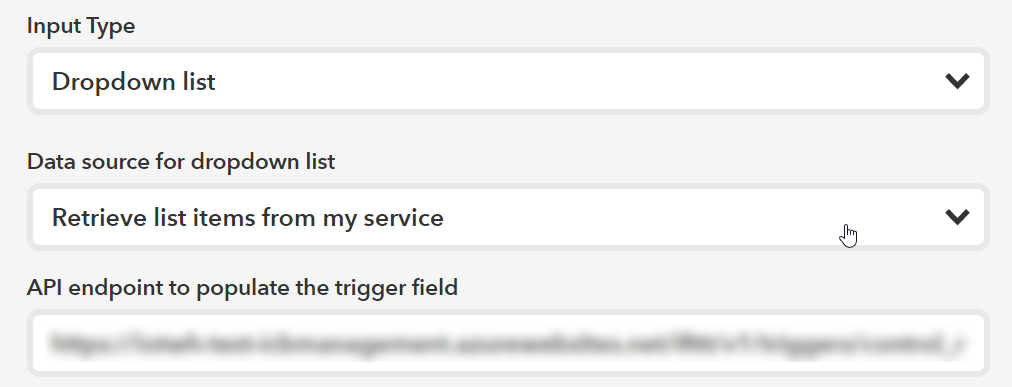
Figure 12. IFTTT Trigger DeviceId field
In the “API endpoint to populate the trigger field” you need to input:
{your management app url}/ifttt/v1/triggers/control\_mode/fields/device\_id/options
Now you are done with the “Trigger Fields” and next up is “Verbiage” but before you setup the “Verbiage” section you need to setup the “Ingredients” section so scroll past “Verbiage” for now. In “Ingredients” section click to add a new ingredient. And setup it exactly the same as the image below.
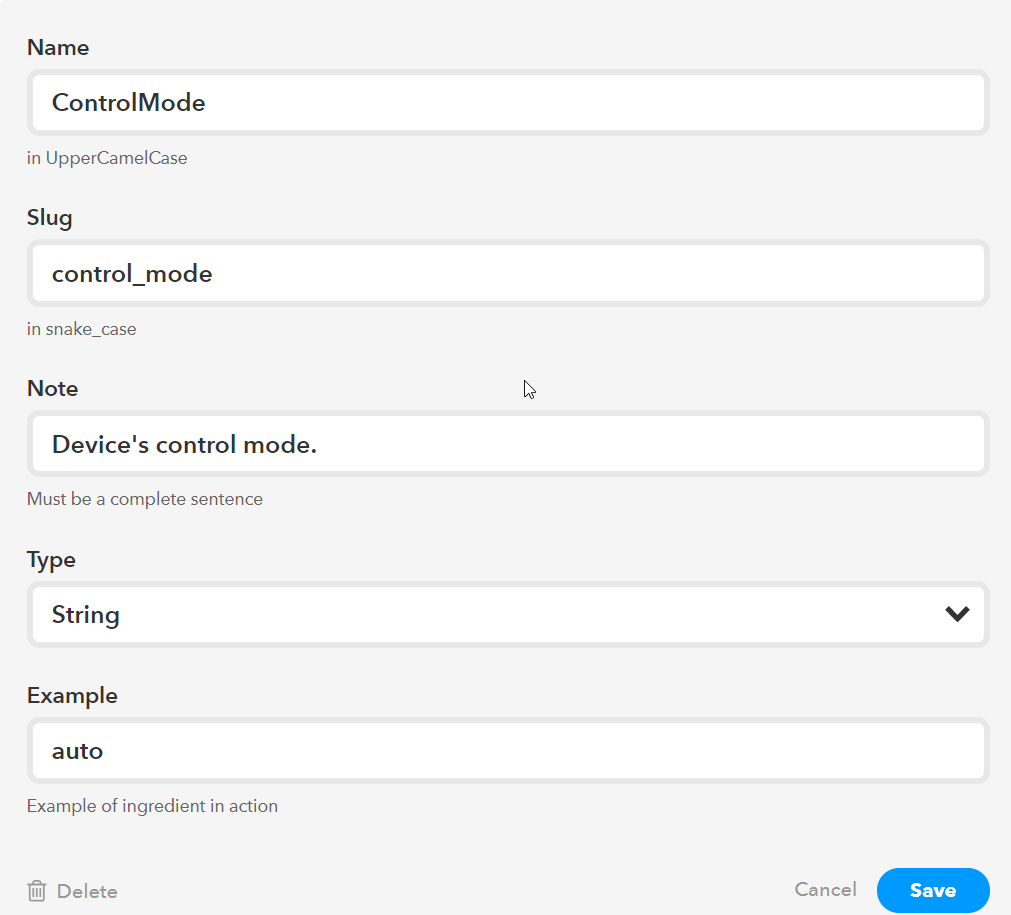
Figure 13. IFTTT Triggers Ingredients
When you are done make sure to save this ingredient. Now you can go back to the “Verbiage” section and make your Verbiage field look exactly as the image below.

Figure 14. IFTTT trigger verbiage
Make sure to save your verbiage section. Last thing in the Triggers tab is to setup our Applet templates. The 3 notification types we will use are “Mobile push notification”, “Short message” and “Long post”.
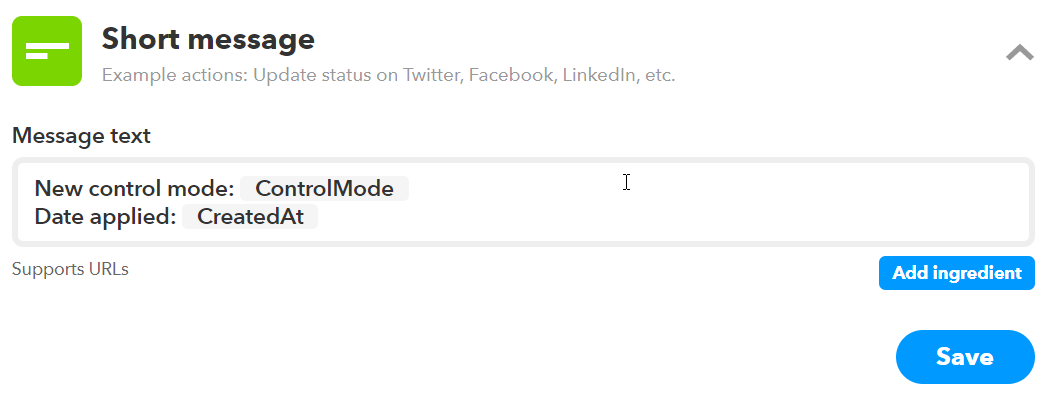
Figure 15. IFTTT short message
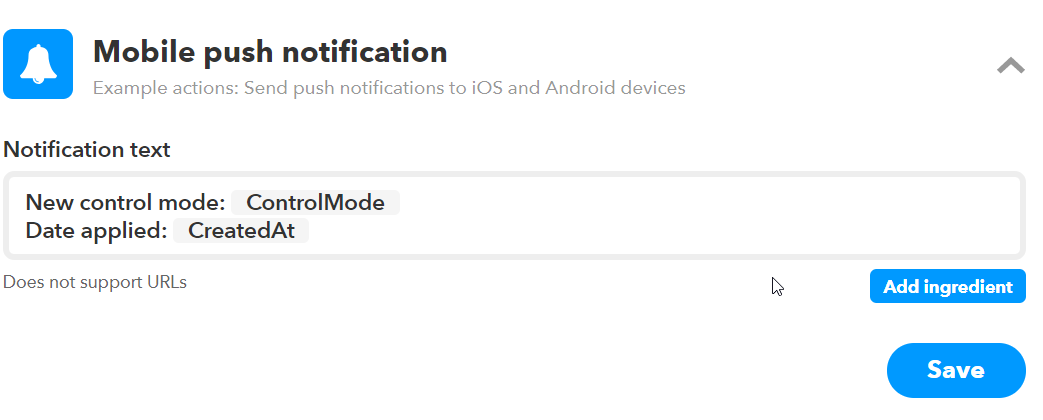
Figure 16. IFTTT mobile push
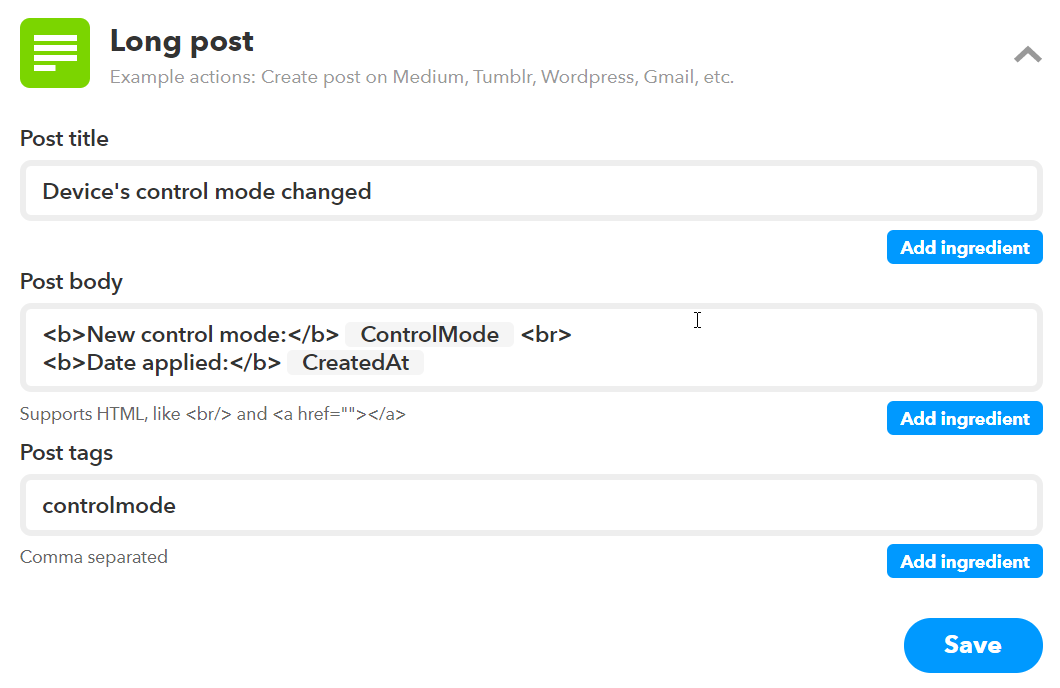
Figure 17. IFTTT long post
Make sure to save everything and you are done in the Triggers tab.
Actions tab
Now it’s time to setup the Actions tab. You will first create the “heater_on” action. Open it and click on “New action” button. Input “Name”, “Description” and “Endpoint” for your action.

Figure 18. IFTTT action endpoint
The “Endpoint” should look like the image above. For now leave the “Verbiage” field empty and click save. After you save the action an “Action Fields” section will appear. Click on “Add action field” and make it look like the picture below.
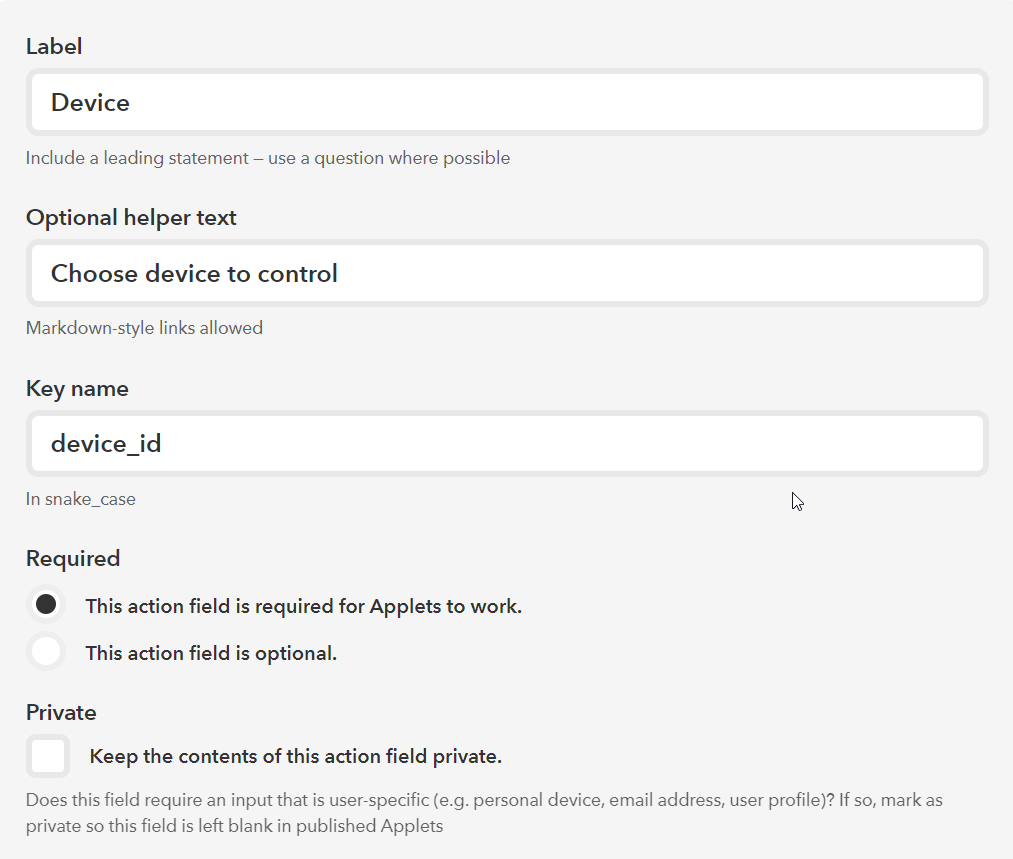
Figure 19. IFTTT action fields

Figure 20. IFTTT action fields
Make sure to save the action field you created. Now go back to “Verbiage” section and make it look like the image below.

Figure 21. IFTTT action verbiage
Following the exact same pattern just with the proper URLs you can make other actions. Make sure everything is saved and you are ready with the actions tab.
IFTTT Integration testing
Before you begin the integration testing, you should go back and fill the config settings in all your resources that depend on the IFTTT Service. To test if the integration was successful you can go to IFTTT platform and under API tab you can run “Endpoint tests” and “Authentication tests”.
Direct link: https://platform.ifttt.com/services/{Your username}/api