Viber
This document provides all required steps to create and link a new Viber bot account to the Viber bot web API project.
Create Viber account
- Head to https://partners.viber.com/confirm?returnUrl=%2Faccount%2Fcreate-bot-account
- Fill in the phone number that will administrate this account. You need access to this number to input back a verification code:
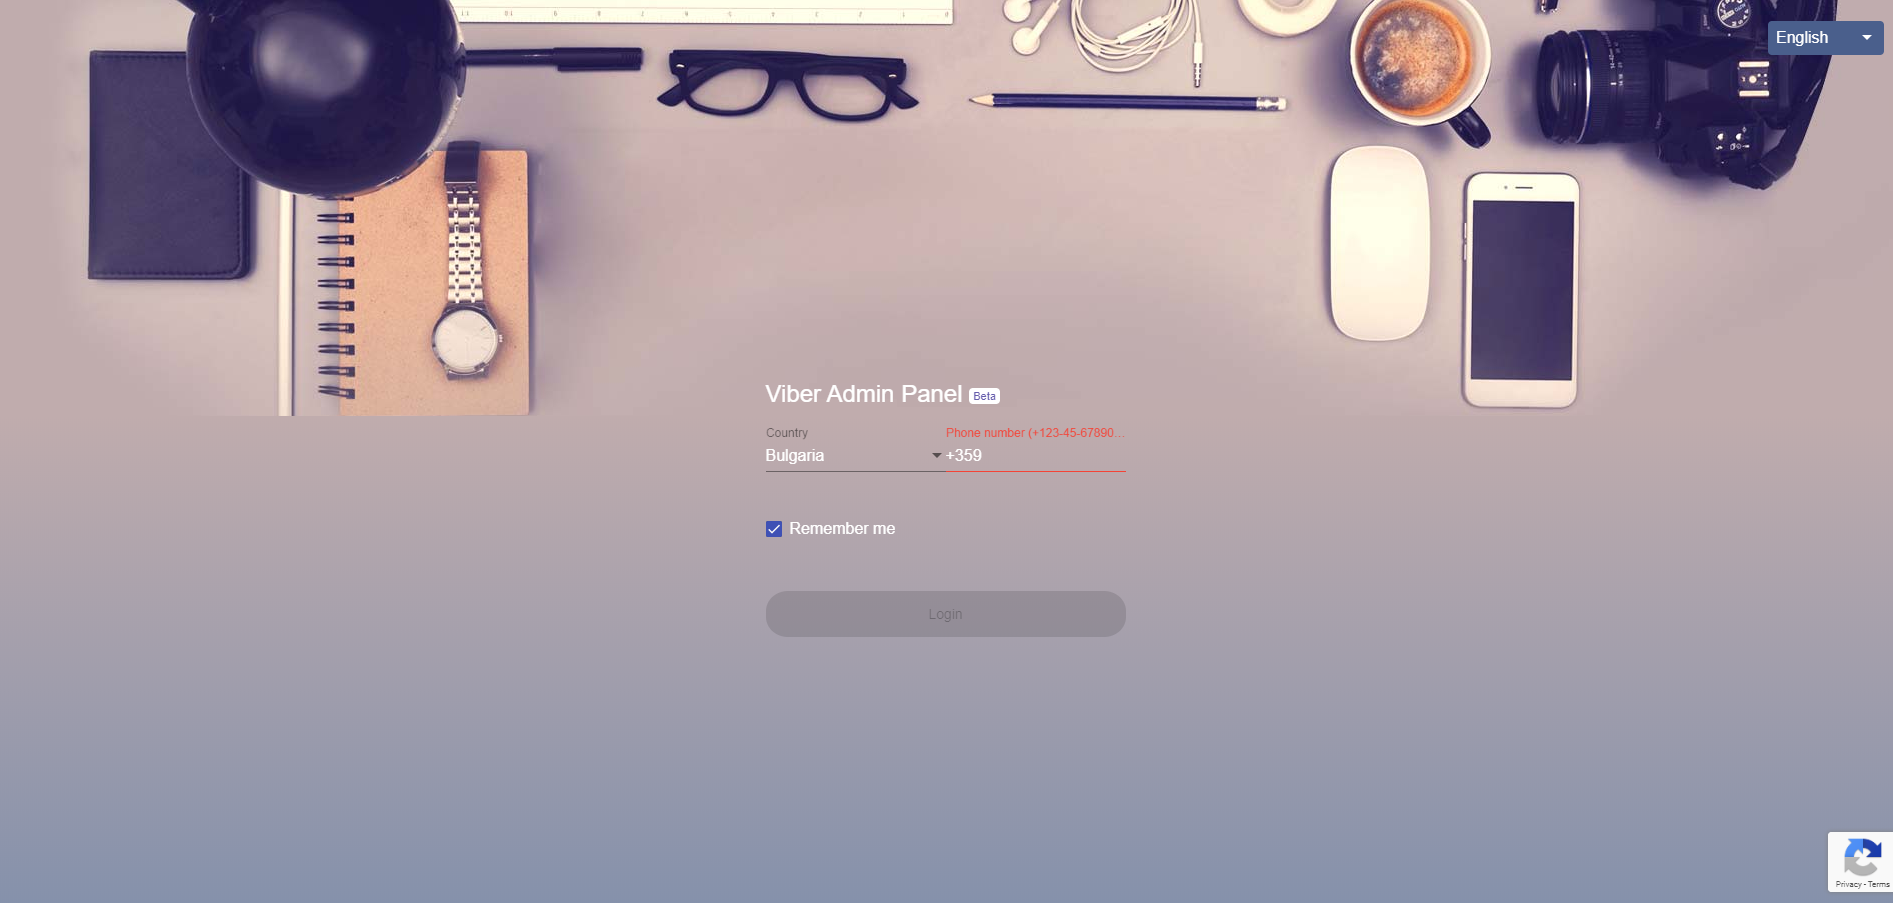 Figure 1: Log in Viber admin panel
- After logging in, click the Create Bot Account and fill in the required information. For category input Local Businesses and for subcategory Information & Statistics:
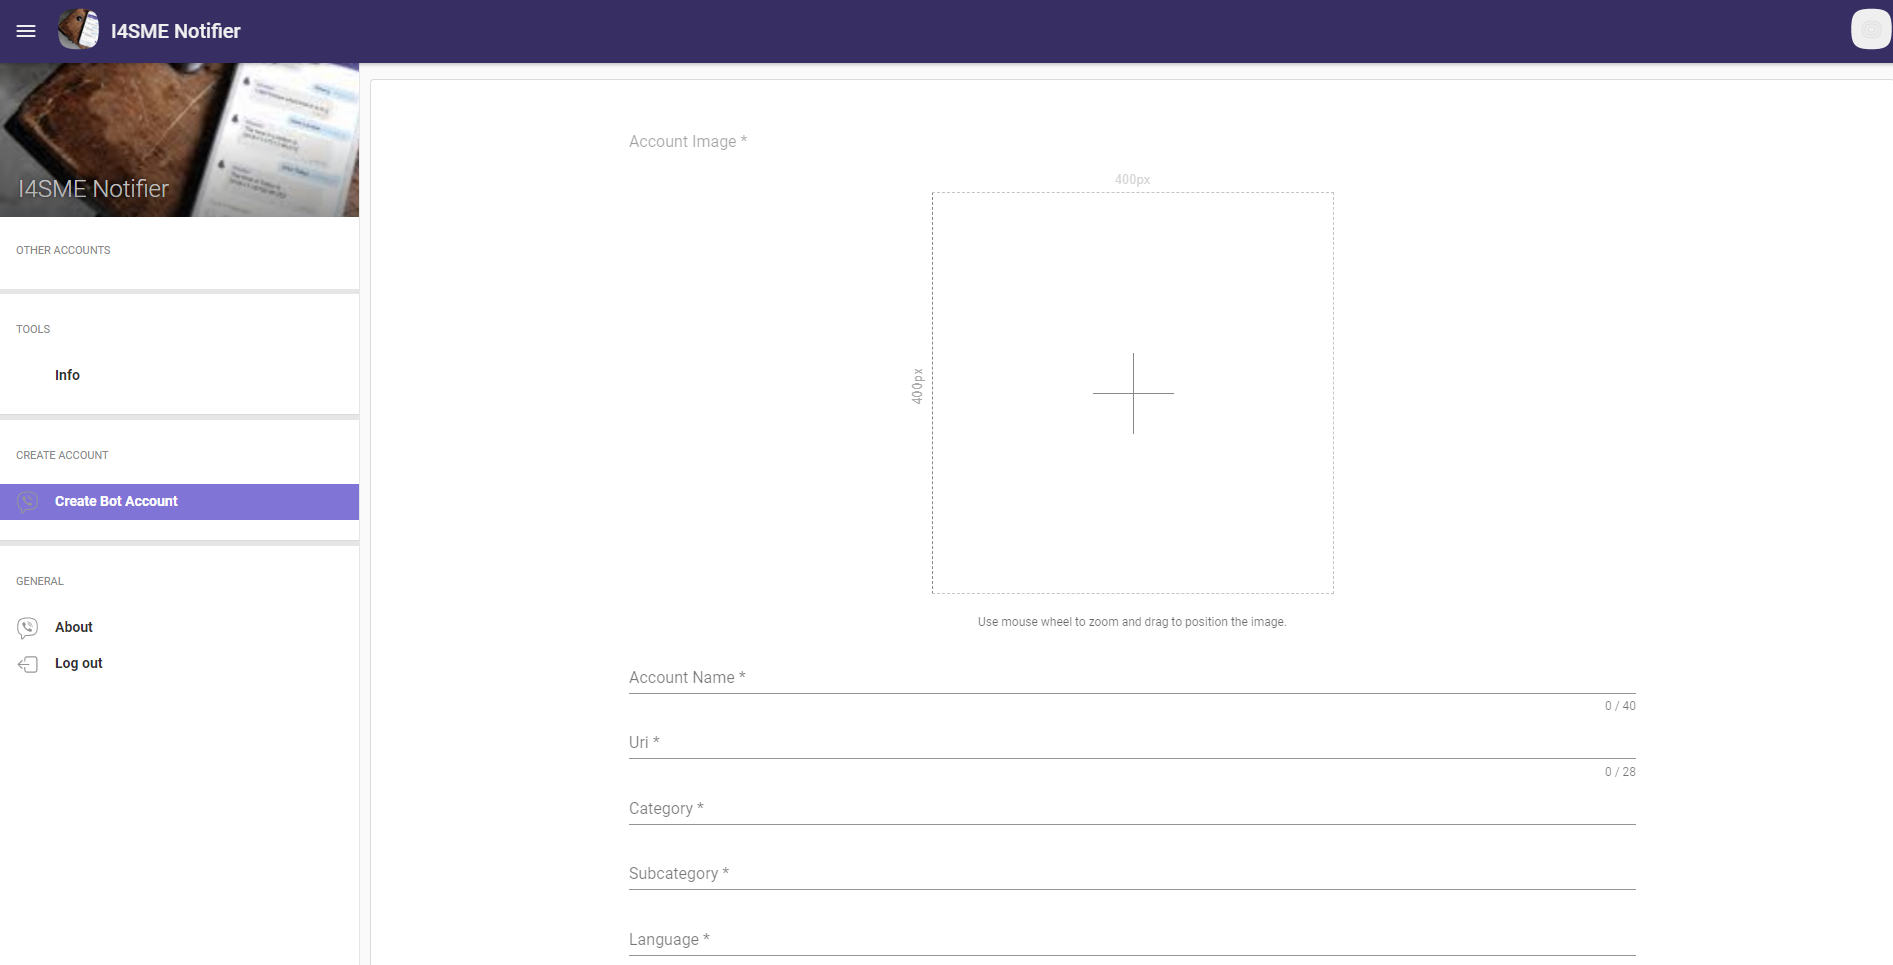 Figure 2: Create Viber bot account
- After creating the bot you will be presented with the Auth Token, copy it and paste it into the application settings:
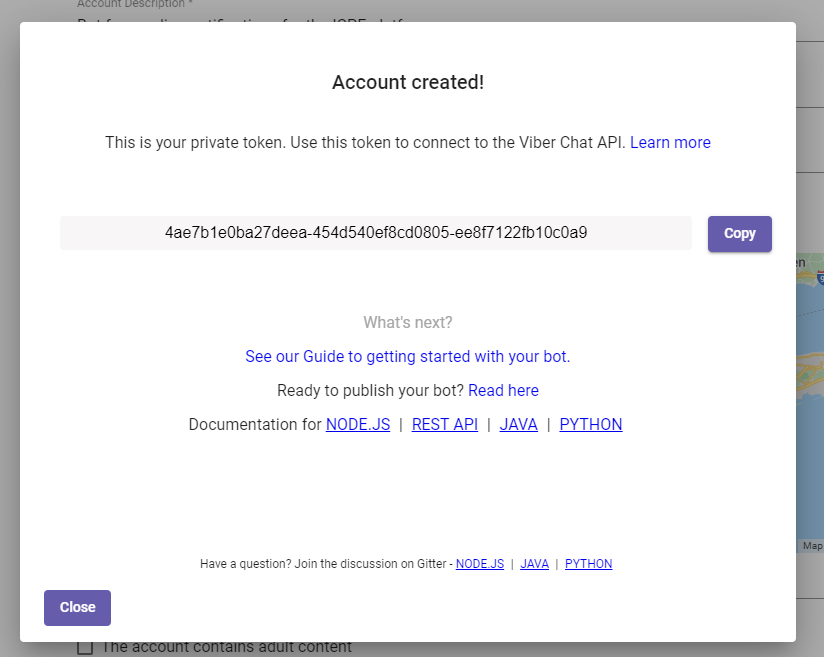 Figure 3: Viber bot account created - copy auth token
Set Viber Auth token in Upkip Administration
Open Upkip Administration.
Select menu Notification servers/Media Types. Paste the Viber authentication token in the field Viber Authentication Token and click Update.
- Viber Authentication Token is saved
 Figure 4: Upkip Administration-Notification server-Media Types-Viber
Set this key to the Viber:AuthenticationToken setting in the ViberBot web app project.
Set Deep Link URL
- Build a deep link URL using the name of the bot you just created:
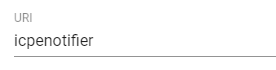
In this case, the deep link URL till be:
viber://pa/info?uri=icpenotifier
- Set the correct Viber deep link URL to the Viber.DeepLink setting in the PublicAPI project.
Create QR Code
Last but not least we must generate a QR code leading to the Viber deep link URL so the users can be redirected to the bot when clicking on the QR Code on the mobile phone.
Navigate to a QR Code generator tool, e.g. https://www.qr-code-generator.com/
- Paste the Viber deep link in the text field, e.g viber://pa/info?uri=icpenotifier
- Generate and download your QR code image.
- Paste the QR Code in the NotificationServer.Function project in the Content folder and rename it accordingly.
- Change the ViberBotQRCode setting accordingly to the path of the new QR Code.
- Redeploy the notification server.
SMS
This section provides instructions on how to create a Twilio account and Messaging service and filling required parameters in Notification servers/Media Types.
- Create Twilio account
- Configure in Upkip Administration Twilio account SID and Token
- Configure in Upkip Administration Twilio phone number
- Configure in Upkip Administration Twilio Messaging service SID
Create Twilio account
- Navigate to Twilio site - https://www.twilio.com/try-twilio
- Create your free Twilio account by filling required fields

Figure 1: CREATE TWILIO ACCOUNT
- The verification form is shown with button the Verify. Click Verity and follow the instructions.
- The verification email has sent.
- Open the received email with the subject “Verify your email”. Click on the link Confirm Your Email.
- Log in by email and password of created Twilio account. Verify by following the instructions.
- Verify Email has passed

Figure 2: Twilio free account - enter and verify your phone
- The user is prompted to enter the phone number.
- Verification code is sent as SMS
- Enter the code and finish verification
Configure in Upkip Administration Twilio account SID and Token
Get the Twilio account SID and Token
- Log in to Twilio with your account
- Twilio account dashboard is opened
 Figure 3: Twilio account SID and AUTH TOKEN
- Copy the Account SID and Auth Token.
Configure Upkip SMS Media Type SID and Token
- Log with user administrator in Upkip Administration
- Select menu Notification servers/Media Types
- The fields for SMS have to be configured.

Figure 4: Notification server - Media Types

Figure 5: Notification server - SMS Media Type
- Copy from Twilio account SID (1) and paste in the Upkip String identifier (SID) (1) field
- Copy from Twilio account Auth Token (2) and paste in the Upkip Token (2) field.
Configure in Upkip Administration Twilio phone number
Get a Twilio phone number
- Go back to your Twilio account dashboard and Step1: Get a Twilio trial phone number.
 Figure 5: Twilio account - get a phone number
- Click the button Get a trial phone number
 Figure 6: Twilio account - choose a phone number
- Click Choose this Number
- You get the number
 Figure 7: Twilio account - a phone number received
Configure Upkip Administration SMS Media Type phone number
- Go back to Upkip Administration Notification Server/Media Type SMS
- Copy the received number from Twilio (e.g. +17745385034)
- Paste the number in the Sender phone field (3)
- Sender phone is configured.
Configure in Upkip Administration Twilio Messaging Service SID
Get a Twilio messaging service SID
- Go back to your Twilio account dashboard
- Go to Twilio documentation Messaging Services - https://www.twilio.com/docs/messaging/services
There is described how to configure messaging services. This is possible through Console or using the REST API.
 Figure 9: Twilio Help - Send a message with a messaging service
- Receive the messaging service ID (SID) by using some of the given examples.
- From the Twilio account dashboard select menu Programmable messaging

Figure 10: Twilio account dashboard - Select Programmable messaging
- Programable Messaging Dashboard is opened.

Figure 11: Twilio account - Programmable messaging dashboard
- Click on Messaging service
- Messaging Services page is opened. Click button Create Messaging Service.

Figure 12: Twilio account - Messaging services
- Create messaging service by filling in the service name and messaging service use case and clicking Create.
 Figure 13: Twilio account - Create Messaging services
- Follow the wizard to finish Message service creating.
- Select again menu Messaging services and open Messaging Services page.
- Messaging service is created and visible by Name and SID.
 Figure 14: Twilio account - Created Messaging service with Name and SID
- Copy the Messaging service SID
Configure Upkip Messaging service SID
- Go back to Upkip Administration Notification Server/Media Type SMS
- Type in the field Use Message Service: True
- Type in the field Message Service SID the SID of created Messaging service.
- Click Update to update/save the SMS Media Type data.
The Upkip platform uses its SMTP server by default.
In the Upkip Administration menu Notification servers/Media Types option Use Upkip Email Service is checked by default.
There is no problem if the client wants to use another SMTP server (own or third party). You only need to uncheck the option Use Upkip Email Service and enter the appropriate parameters in the Upkip Administration/Notification servers/Media Types.
Also SendGrid can be used as a service provided by the SMTP server, for which we give him detailed instructions.
Create sender identity
Before sending an email, you’ll need to create a sender identity. There are two ways to do this, but SendGrid recommends creating a Single Sender to get set up quickly.
- Open send grid resource in Azure
- Click on Manage
- If requested, confirm the assigned e-mail address. SendGrid Account Manage link and Confirmation link should be opened with the same browser
- Proceed to Create a Single Sender by following the site’s instructions
- From Name, Company Address, and Nickname: Upkip <customer_identifier>
- From Email Address and Reply To: upkip@icb.bg
- City: Sofia
- Country: Bulgaria
 Figure 1: AAD - Create a Sender
- Confirm the email
- Configured senders can be found here: https://app.sendgrid.com/settings/sender_auth/senders
API Key setup
Next, a new API Key should be setup:
- In Send grid portal, go to Settings > API Keys
- Generate a new Key with the name Upkip and choose Full Access
- Copy-paste the value in the environment configuration file
- Open the Upkip Administration / Notification Server / Media Types / Email and update relevant settings
- Use the same key to configure Upkip Visualization (Grafana SMTP settings):
- RDP into the Grafana VM and manually fix the “[smtp] password” parameter in conf\custom.ini configuration file. Restart grafana-server service.
- If necessary fix the smtpFromAddress which by default is set to upkip@icb.bg:
- Upkip Administration
- Upkip Visualization
Fill in Upkip Administration Email fields
Open Upkip Administration/Notification servers/Media Types. Fill in Email section configuration parameters.
 Figure 2 : Upkip Administration - Notification servers - Media type Email
IFTTT
IFTTT (If This Then That) defines a clear and concise protocol that your service’s API will implement. Each trigger and action for your service will map 1-to-1 to an API endpoint on your service built specifically for IFTTT. Trigger endpoints will be event streams that IFTTT will poll for new data. Conversely, action endpoints will be writable endpoints that IFTTT will send data to. For services that use OAuth, IFTTT is fully compatible with a couple of the common flavors of OAuth 2.0.
IFTTT is a free platform that helps you do more with all your apps and devices. We will use IFTTT to send notifications to our users when some trigger occurs. We will have to integrate our IFTTT Api with the IFTTT system. IFTTT will have access to our API’s to poll the data they require.
IFTTT API
Creating Web App
- Go to the Azure Portal and using the Dashboard you can find and create a Web App resource.
- On creation page you can connect the Web App to the already existing Application Insights that you created earlier.
Setup OAuth 2.0 Authentication
To set up Azure OAuth 2.0 Authentication you will need to create 2 AAD (Azure Active Directory) Applications. One will represent the IFTTT API, and the other will have privileges to access the IFTTT API and will be used to obtain access tokens with which you will authenticate yourself in front of the IFTTT API.
IFTTT API AAD Application
- Open the Azure Portal and go to Azure Active Directory.
- Open App registrations and click on “New registration”.
- On creation for “Redirect URI” put the URL of your IFTTT Web App + “/.auth/login/aad/callback”. Example: “https://osohw-test-iftttapi.azurewebsites.net/.auth/login/aad/callback”.
- After it’s created go to “Manifest” and add “identifierUris” which is the URL of your IFTTT Web App.
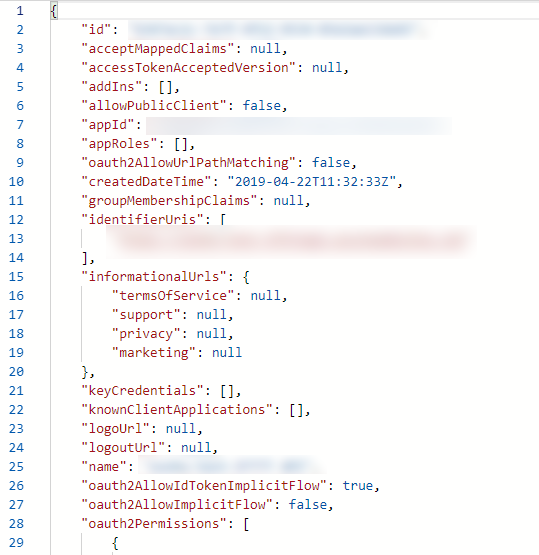
Figure 1: IFTTT Identifier URL
IFTTT App AAD Application
- Open the Azure Portal and go to Azure Active Directory.
- Open App registrations and click on “New registration”.
- On creation for “Redirect URI” put the URL of your IFTTT Web App.
- After it’s created go to “Certificates & secrets” and create a new “Client Secret”, save it somewhere it will be required for you to get an access token.
- Go to “API permissions” and add permission to access the IFTTT Api AAD Application.

Figure 2: IFTTT API Permissions
Setup application settings
Now it’s time to set up the appsettings.json of the IFTTT API.
- Open Visual Studio 2019 and open the solution.
- Find the “IFTTTAPI” assembly and there under appsettings.json you will see appsettings.Development.json.

Figure 3: IFTTT API Settings
- Open the appsettings.Development.json and edit the following variables:
- TenantId – To get your Tenant Id go to the Azure Portal, Azure Active Directory, Properties and copy the “Directory ID”. The tenant id should look like this:
https://login.microsoftonline.com/{your tenant id here}
- Domain – The domain should be the URL of the newly created IFTTT Web App.
- ClientId – The client id should be the URL of the newly created IFTTT Web App.
- InstrumentationKey – The instrumentation key of the Application Insights you created earlier.
- IFTTTServiceKey – The key of your IFTTT Service (you will come back to fill this after you complete the “IFTTT Service”).
- IFTTTAppId – The application ID of the IFTTT App AAD Application.
- TenantAuthority – The tenant ID of the IFTTT App AAD Application. To get your Tenant Id go to the Azure Portal, Azure Active Directory, Properties and copy the “Directory ID”. The tenant id should look like this:
https://login.microsoftonline.com/{your tenant id here}
- ClientId - The application ID of the IFTTT App AAD Application.
- ClientSecret – The client secret you created for IFTTT App AAD Application.
- ResourceId – The IFTTT Web App URL.
- IoTHub.ConnectionString - The connection string to your IoT Hub.
For the Azure Web Application to be able to read the correct appsettings.json you now need to go the the resource Application Settings and a new one. Since we are using the appsettings.Development.json you will need to add an environment variable with the value “Development”.
Figure 4: IFTTT API Environment Variable
IFTTT Test User
IFTTT will need you to provide a test user through which they can test your service on publishing.
You can go to the Azure Active Directory and under “Manage” section click on “Users”. From there you can add a new user by clicking on the “New user” button.
After that go to Azure Active Directory and under “Manage” section open “Enterprise applications”. In the list of applications find your IFTTT App AAD Application and open it.
Then under “Manage” you will see “Users and groups” open it. Click on “Add user” and select the test user you created.Save your user information somewhere because you will need it later.
IFTTT Service
IFTTT is a free platform that helps you do more with all your apps and devices. We will use IFTTT to send notifications to our users when some trigger occurs. We will have to integrate our IFTTT Api with the IFTTT system. IFTTT will have access to our APIs to poll the data they require.
API Section
General tab
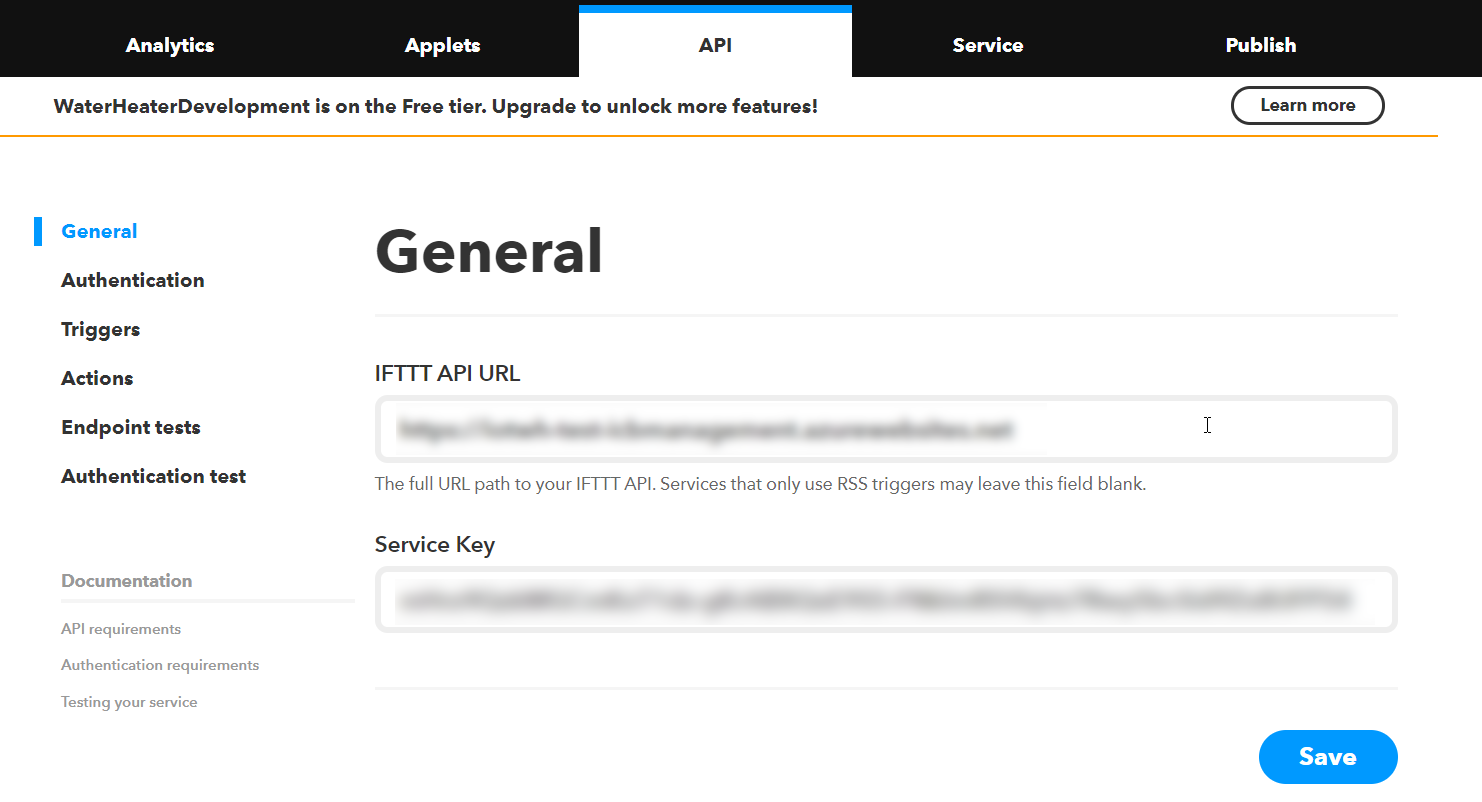
Figure 5: IFTTT API General tab
In the general tab, there are 2 fields. In “IFTTT API URL” you need to input the URL of the Management Web App. The second field “Service Key” is something you will need later so make sure to save it somewhere. Copy the "Service Key".
Fill in Upkip Administration IFTTT fields
Open Upkip Administration.
Select menu Notification servers/Media Types.
Paste the Service Key in the field IFTTT Service Key (1).
 Figure 6 : Upkip Administration - Notification servers - Media types - IFTTT fields
Go to IFTTT platform, Realtime API documentation https://platform.ifttt.com/docs/api_reference#realtime-api.
Copy the Realtime endpoint "https://realtime.ifttt.com/v1/notifications" and paste into the field IFTTT RealTime EndPoint (2). Click Update to save Media Types settings.
Authentication tab
Now let’s move on to the “Authentication” tab.

Figure 6: IFTTT API Authentication tab
In the authentication tab select the option “My API has users with expiring OAuth2 access tokens and uses refresh tokens”. After you do that some new fields will show up where you will need to input the correct data so IFTTT can authenticate itself in front of our APIs.

Figure 7: IFTTT Authentication fields
-
Client ID – here you need to input the Application ID of your IFTTT AAD Application.
-
Client secret- here you need to input the Password key you created when creating the IFTTT AAD Application.
For the “Authorization URL” and “Token URL” you need to go to your Azure Portal and open Azure Active Directory.
Under the Manage section open “App registrations (Preview)” and from there you should open “Endpoints” which can be found on top of the blade. You are looking for “OAuth 2.0 Token Endpoint (v2)” and “OAUTH 2.0 Authorization Endpoint (v2)”.

Figure 8: AAD Authorization endpoints
Before you paste them into the fields you need to make small editions to the Authorization URL. At the end of your Authorization URL you need to add the following:
?scope={URL of your Management Web App}/user\_impersonation offline\_access
Example Authorization URL: https://login.microsoftonline.com/d4f23865-c0bd-4784-8c5c-165750372dc3/oauth2/v2.0/authorize?scope=https://iotwh-test-iftttapi.azurewebsites.net/user_impersonation offline_access
-
Authorization URL – now that you edited your Authorization URL put it in.
-
Token URL – put in the Token endpoint URL you just copied from the Azure Portal.
Redirect URL after authentication completes:
https://ifttt.com/channels/{{service_id}}/authorize.
This is what your redirect URL should look like, and instead of {service_id} put in the actual IFTTT service ID you chose earlier.
In the Demo account fields, you need to input the account information of the IFTTT test user you created earlier in the Azure Portal. Put in the Account Login and Password. The “Demo account notes” can be anything. You are ready with the Authentication tab, make sure to save it.
Triggers tab
You will create a trigger for Control Mode Change. When you open the triggers tab you should see a “New trigger” button, click it.

Figure 9: IFTTT Triggers
Make your trigger name section look the same as the image and click Save. After you save more fields will show up. Firstly you will create a new Trigger Field.
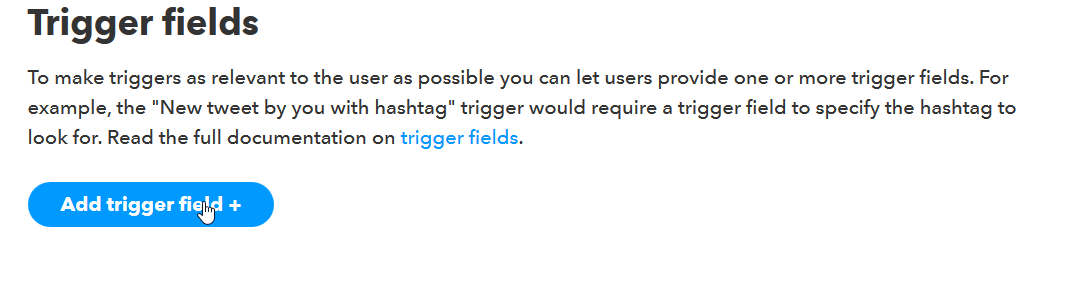
Figure 10: IFTTT Trigger Fields
After creating a trigger field you will have to set up it.

Figure 11: IFTTT Trigger DeviceId field
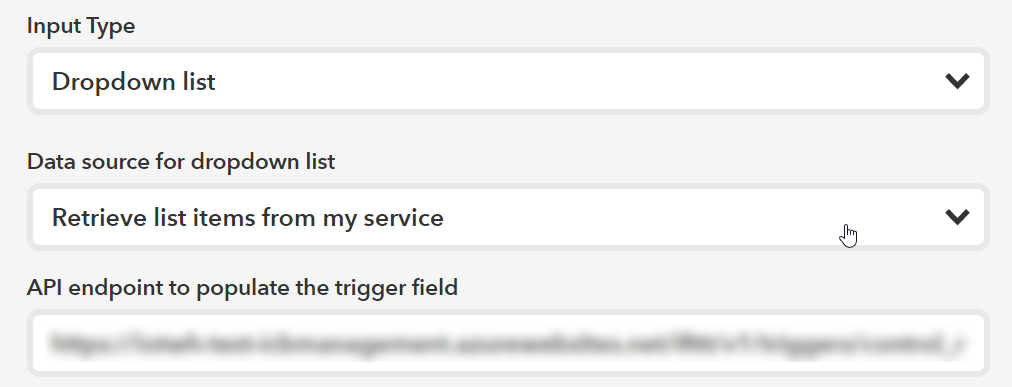
Figure 12: IFTTT Trigger DeviceId field
In the “API endpoint to populate the trigger field” you need to input:
{your management app url}/ifttt/v1/triggers/control_mode/fields/device_id/options
Now you are done with the “Trigger Fields” and next up is “Verbiage” but before you setup the “Verbiage” section you need to setup the “Ingredients” section so scroll past “Verbiage” for now. In “Ingredients” section click to add a new ingredient. And setup it exactly the same as the image below.
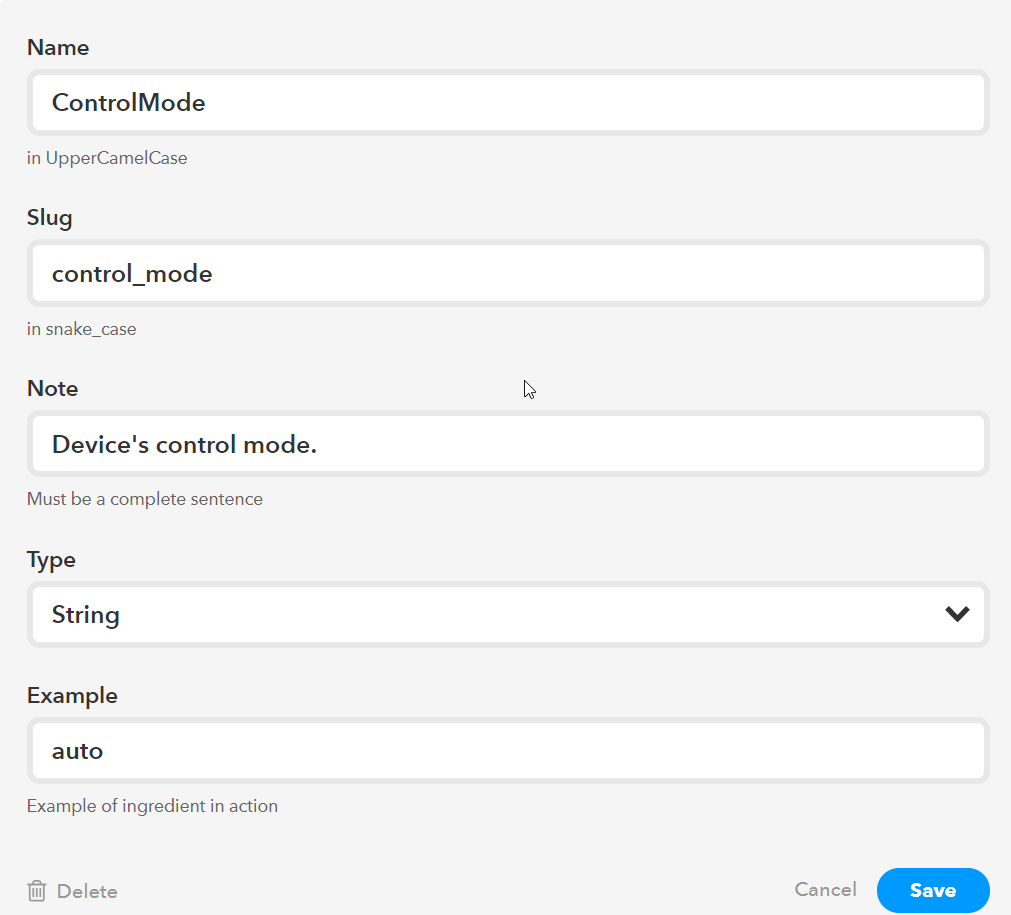
Figure 13: IFTTT Triggers Ingredients
When you are done make sure to save this ingredient. Now you can go back to the “Verbiage” section and make your Verbiage field look exactly like the image below.

Figure 14: IFTTT trigger verbiage
Make sure to save your verbiage section. The last thing in the Triggers tab is to setup our Applet templates. The 3 notification types we will use are “Mobile push notification”, “Short message” and “Long post”.
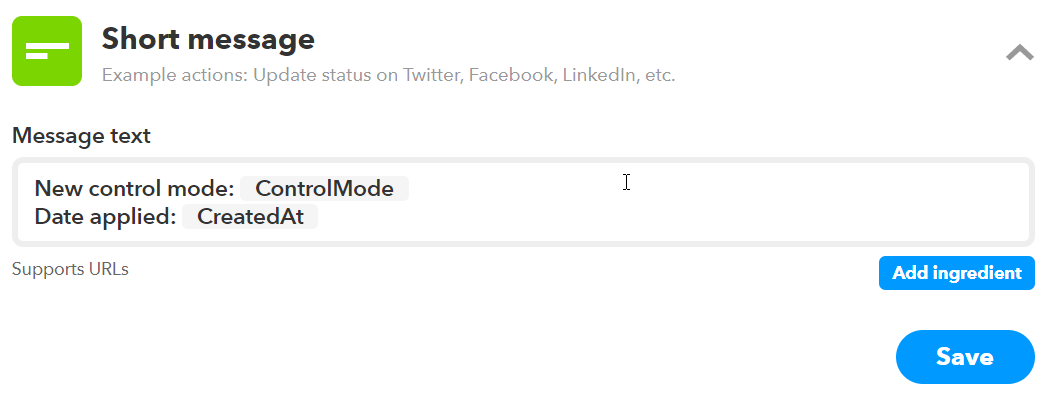
Figure 15: IFTTT short message
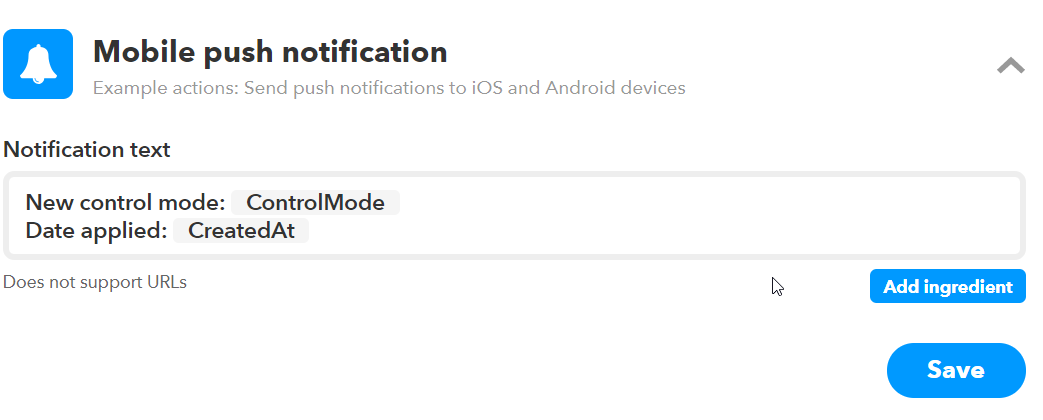
Figure 16: IFTTT mobile push
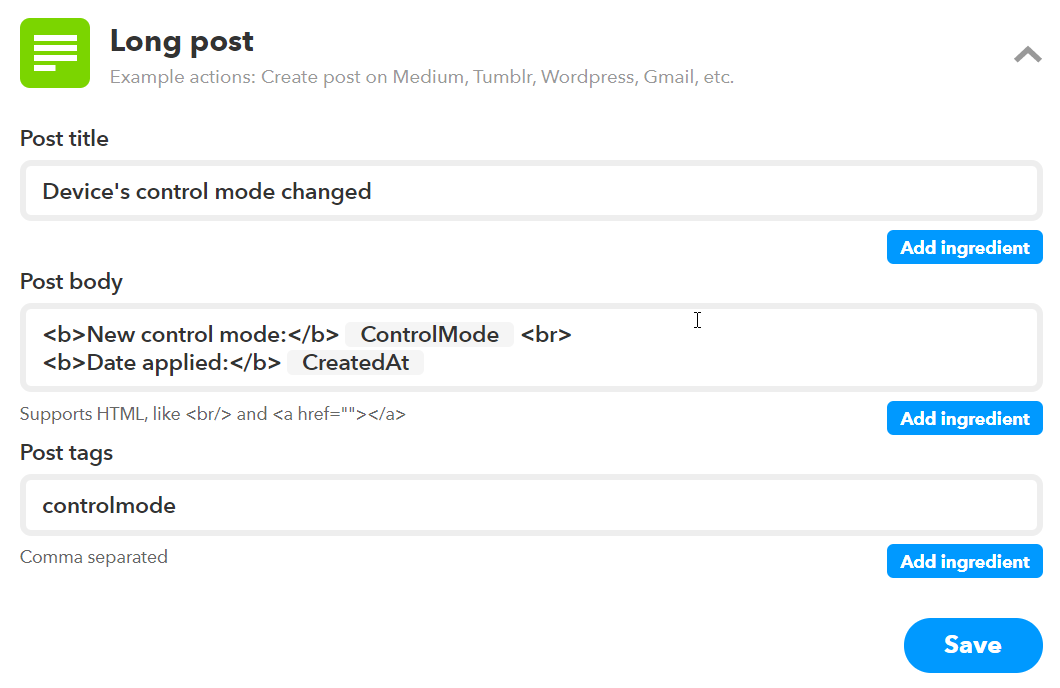
Figure 17: IFTTT long post
Make sure to save everything and you are done in the Triggers tab.
Actions tab
Now it’s time to set up the Actions tab. You will first create the “heater_on” action. Open it and click on the “New action” button. Input “Name”, “Description” and “Endpoint” for your action.

Figure 18: IFTTT action endpoint
The “Endpoint” should look like the image above. For now, leave the “Verbiage” field empty and click save. After you save the action an “Action Fields” section will appear. Click on “Add action field” and make it look like the picture below.
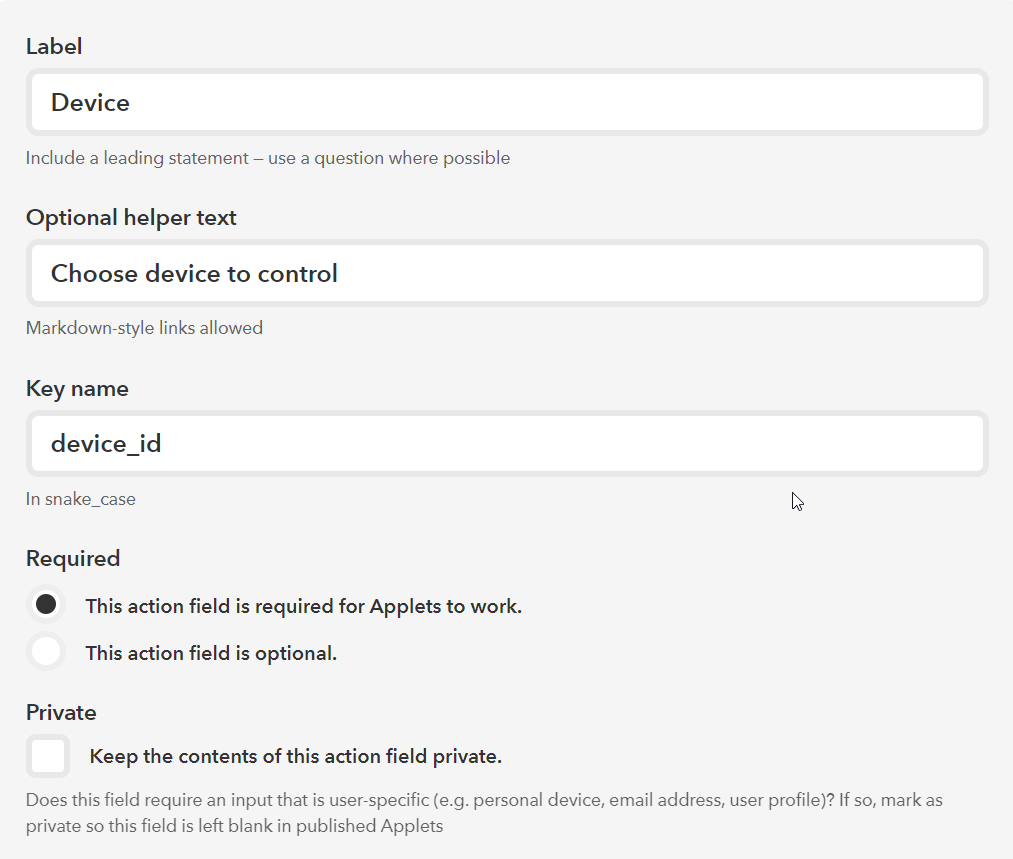
Figure 19: IFTTT action fields

Figure 20: IFTTT action fields
Make sure to save the action field you created. Now go back to the “Verbiage” section and make it look like the image below.

Figure 21: IFTTT action verbiage
Following the same same pattern just with the proper URLs, you can make other actions. Make sure everything is saved and you are ready with the actions tab.
IFTTT Integration testing
Before you begin the integration testing, you should go back and fill the config settings in all your resources that depend on the IFTTT Service. To test if the integration was successful you can go to the IFTTT platform and under the API tab you can run “Endpoint tests” and “Authentication tests”.
Direct link: https://platform.ifttt.com/services/{Your username}/api
Microsoft Teams
This section provides instructions on how to configure Microsoft Teams notifications. To configure the notification to Microsoft Teams go through steps:
- Install Microsoft Teams
- Get channel link
- Invite a user to the team
- Configure notification to Microsoft teams in Upkip Administration
Microsoft Teams
Install Microsoft Teams
- Install Microsoft Teams on your device.
- If you are a part of a team skip this, otherwise create a new team, or join one.
- Click on the Teams window and search for the Join or create a team button at the bottom of the window.

Figure 1: Join or create a team
Get channel link
Note: If you have created a new team, it will automatically create a General channel for you, otherwise you will see the channel/’s that are part of your team.
- Right-click on the channel that you want to receive messages to.
- Select Get link to channel

Figure 2: Get link to channel
- Copy the provided URL

Figure 3: Copy link to the channel
Invite User to the Team
To be able to send messages to some team, you need to create an internal system user only for the purposes of the Upkip. Then invite this user to your team.
Right-click on the team name and select menu Manage team

Figure 4: Open manage team
- Manage team is opened
Click Add member and type the user in the search bar

Figure 5: Manage team - open add member

Figure 6: Add Upkip Notifier member to the team
Continue adding other members to the team.